Sunday, September 12, 2010
Noodle Bowl!
Sometimes it takes someone else getting excited about something to remind you that those things you've grown accustomed to are, in fact, quite amazing.
I had the subtle pleasure of going to the giant Asian market, Super H Mart, in Carrollton with someone who had never been. We spent two hours browsing every single aisle, probably driving the regular just-coming-in-to-pick-up-a-few-items shoppers bananas. As I watched my friend take in every single product on every shelf down every aisle, many of which I recognized from years ago, I was reminded that growing up in Taiwan is pretty freaking cool.
I guess the moral of this recipe / story is that sometimes you just have to remember to appreciate the simple things that you so often take for granted. Like a bowl of noodles.
Pictured above:
udon noodles (fresh from the refrigerated section; mine came with 5 individual servings; I used one serving for this dish)
2 bunches of bok choy, sliced
2 fresh shiitake mushrooms, sliced
1 egg
broth
chili paste & green onions for garnish
I cooked the noodles according to the directions (which were in Japanese! I couldn't read them, so I looked for numbers and saw "5-6" in the midst of the gibberish).
I removed the noodles, but kept the broth in the pot to which I added 1 tbsp of vinegar to poach my egg.
Once the egg white set, I gently dropped in the bok choy cooked for another minute.
In went the mushrooms.
Then all the contents were poured over the noodles.
I topped with chili paste and diced green onions and a little soy sauce.
Then I ATE IT! (and thought of my mom and grandparents and thanked my lucky stars.)
Tuesday, September 7, 2010
A recipe for happiness
While everyone (or at least I felt like "everyone") was doing Labor Day stuff with their families, I was stuck in Dallas sans family and feeling pretty bummed about it. I admit, I let it get the best of me yesterday. But as much as I wanted to bawl my eyes out, all I could squeak out was a measly half tear. And then, an idea. There is what's known as a burger institution in Dallas called Keller's Drive-In. I was reminded by coincidence that I had always wanted to try it. Gave them a call, confirmed they were open, and went on my bummed / merry way.
The recipe for happiness when you're bummed and lonely on Labor Day is as follows:
cash
transportation to Keller's Drive in
#5 off the menu (a double-patty burger with lettuce, tomato, and some sort of sauce that is kind of like the Big Mac sauce)
+ cheese on that burger
chili cheese tots
Diet Coke
Eat there and order yourself a beer, or take it home and wallow a bit in your misery as I did. The misery will vanish. I promise.
Note: If you are not prone to bumminess often, this is a great recipe for cheering you up. However, if you often find yourself bummed out and need cheering up a lot, I recommend Keller's only once or twice and then a psychiatrist. We don't want you to add weight problems to your mental health problems.
Sunday, May 9, 2010
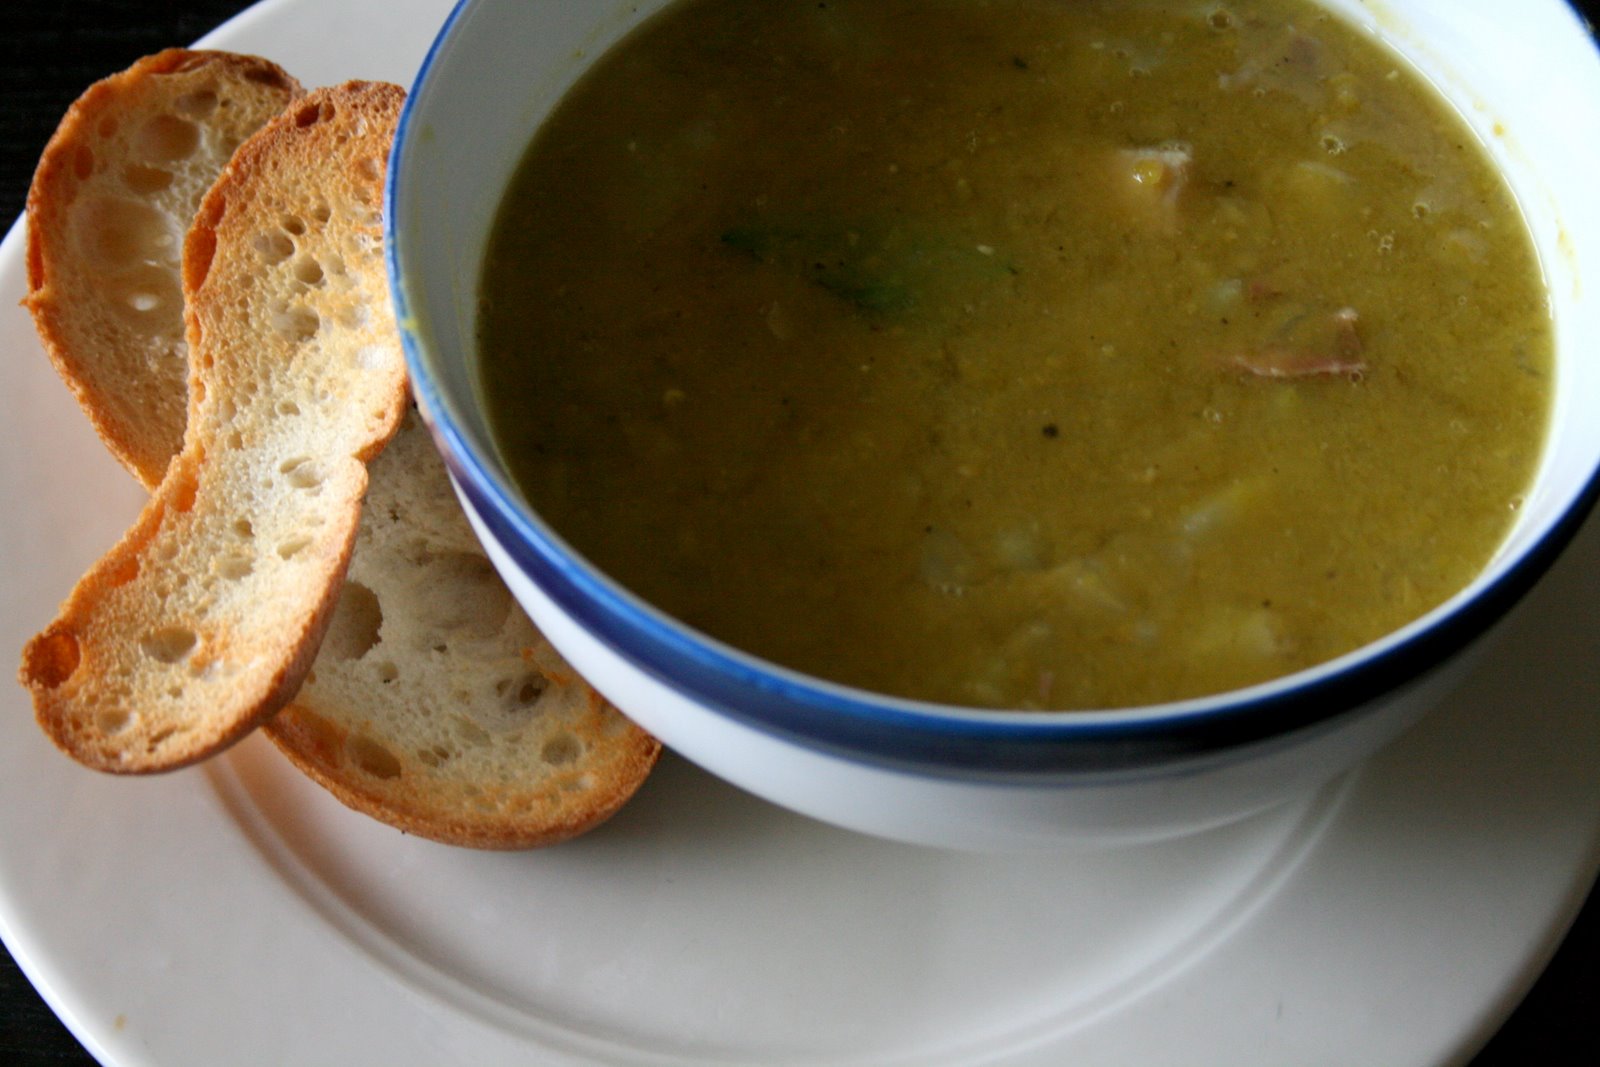
Split Pea Soup
Today felt like a split-pea-soup kind of day. This was an odd conclusion for me to come to while shopping at Sprouts (my new Sunday morning ritual) since I've never made nor had split pea soup, and it's May. But the morning was a bit dreary and surprisingly cool, and all the ingredients I figured were necessary for this dish were right there in front of me.
Here's what I grabbed / had on hand:
1 yellow onion
1 clove garlic
1 Russet potato
6 cups chicken stock
1 lb split peas
1.5 lb ham hocks
1 bunch Italian parsley
salt + black pepper
In my favorite red Dutch oven, I drizzled some canola oil and sauteed my chopped onion (seasoned with a bit of salt).
Once the onions were soft, I added my chopped garlic.
While the garlic was cooking over med-low heat, I peeled and diced my potato. This also went in the pot and was seasoned with a little more salt.
I stirred these around for few minutes, added the ham hocks, poured in my pound of split peas (no soaking. really! it wasn't necessary) and the six cups of chicken stock.
This all came to a boil, and I turned the heat down to very low and let it simmer for about 3 miles on the treadmill and 6 miles on the stationery bike (50 minutes. Yes, I run very slowly).
When I got home, I stirred my soup and it turned green. Apparently split peas disintegrate after enough cooking.
I gave it another 10 minutes uncovered on low and took out the ham.
I had a huge bowl with a few sprigs of parsley on top and toasted sourdough bread on the side. Not bad for a first try.
Sunday, August 9, 2009
Lollipop Pies
The boyfriend forwarded a link to a blog post about lollipop pies (or is it pie lollipops?) last week and said to me yesterday, Make those this weekend; that can be your Sunday project. I'm hardly one to turn down a food challenge, so I headed to Central Market to pick up supplies. (That's right: I use any excuse to go to Central Market.)
I cheated and bought refrigerated pie dough, but I did make my own filling. I grabbed a couple of pints of blueberries and blackberries and some lemons. That was way too much fruit, but I digress. Here's the filling recipe.
Filling
1 pint blueberries
1 pint blackberries
Juice of one lemon
1/4 cup sugar (or more if your fruit isn't very sweet)
1/8 cup cold water
2 tsp cornstarch
Put the first four ingredients in a small saucepan and heat over medium heat for about 10 minutes.
Combine the cold water and cornstarch in a small bowl and add to the filling . Continue to heat for another minute.
Remove from heat and set aside.
Other supplies
Lollipop sticks
Pie dough
2 in. round cookie cutter (or similar size)
1 egg (for eggwash)
Pie preparation
Preheat oven to 375F.
If you're using store-bought crust, you will need to let it sit at room temperature for maybe 15 minutes before unrolling it.
Roll dough out as thin as you can. Using a 2in round cookie cutter, cut out as many circles as you can from your dough. (I only got 30 per pie dough roll, or 15 pops). Don't discard your leftovers - roll up, roll out, and cut again.
Put a small amount (maybe a teaspoon or less) of filling on half of the rounds. Pop a lollipop stick in the center of the filling, lay another round on top and, using a stick, press down the sides of the rounds.
Brush lightly with eggwash.
Cover the sticks with foil. You can just lay a strip of foil across the sticks.
Bake for 15 minutes.
Notes: Yeah, they were really cute. I got an "it's charming" comment from the boyfriend. But it took 45 minutes to make 15 mini-pies (and another 15 minutes for baking). Worth it? Sure, as long as you've got an extra pair of hands to help to speed up the process!
Sunday, May 31, 2009
Mex-Asian Spice Rub
This'll be a quickie...we had a package of pork chops in the fridge on the verge of being past its "best by" date. I considered using barbecue sauce, but we just had barbecue for Garth's birthday on Thursday (on May 28th, Garth turned 35! old man...) You really can't have barbecue more than once a week, in my opinion. So I improvised a spice rub with ingredients on hand:
Canola oil
Chili powder
Garlic powder
Onion powder
Salt
Chile paste
Lime juice
Cilantro
Oh, did you want ratios? Err...well, I listed the ingredients in order of amount from greatest to least (except for the oil which was used to make a paste).
The flavor was just right. It was sort of a combination of Mexican & Asian, as both cultures tend to use cilantro and lime and chile / chili. Perfect for the pork chops.
A Bluth Experiment
I love bananas. If you know me, you know why. (If you don't, it's because we grew up on a banana plantation in Costa Rica & the Philippines.)
I also love Arrested Development. Something reminded me of the Bluth banana stand in that show today, and since I made plans not to make plans this weekend, I had time to goof off in the kitchen.
Two things you have to love about this: bananas & chocolate. Really, how can you go wrong with this combination?
I almost don't want to write this in recipe form because it's too simple, and I don't want to seem condescending. Here goes:
Frozen Chocolate Bananas
3 bananas (see below on how to pick out the perfect banana)
6 oz semi-sweet, dark, or milk chocolate chips (your choice)
1 tsp vegetable or canola oil
sprinkles or nuts
popsicle sticks or skewers
(parchment paper)
Slice your bananas in half. Freeze for 15-20 minutes.
In a microwave-safe bowl, combine your chocolate chips and oil and microwave for 30 seconds. Stir, then heat another 30 seconds. Stir again (that did it for me, but if you need to keep going, just do 30 seconds at a time till your chocolate has melted).
Insert the popsicle sticks / skewers in the bananas. Dip in chocolate. Sprinkle with your toppings. Set aside on parchment paper.
Freeze another 15-20 minutes before serving. You can keep the bananas in an airtight container in the freezer for several days.
*Picking the perfect banana:
For this recipe, you will want to pick out a banana that is all yellow (no green at all) but with very few spots. If no spots, your banana will taste "raw." If few spots, it will be ripe enough but still firm. If very spotty, your gonna get a mushy banana, great for banana bread but not for this recipe...
Tuesday, March 31, 2009
Bustier Cake!
This past weekend, I was charged with making a bustier cake (and a penis cake or, as I like to call it, a rocket cake) for a lingerie shower for a friend. I fretted for about two weeks, debating the best method, the right frosting, the decorating...I think I worried more about this cake than I did my last work interview.
I did a lot of research (google images) and asked for sage baking advice from Michelle at work (http://www.thelittledish.com/). The conclusion we came to was that baking the boobies in a bowl and doing a chocolate ganache frosting would be best. I lost my nerve on the ganache as I am completely inexperienced in this area and, as a last ditch effort, I went with homemade cream cheese frosting.
The first go at the frosting was lumpy and homemade-looking. Some quick thinking led me to the sink for some hot water on my finger tips. Using this method, I smoothed out the frosting to make a more professional(professional for me, anyways)-looking frosting. Eureka! It worked!
The final touch was the "lace." The design was ripped from a google image of someone else's bustier cake attempt.
All in all, a complete and total success! Angela, the bride-to-be, was a little skeptical when I told her I made it myself. I consider this the ultimate form of flattery. She thanked me for the cake, while I mentally thanked her for giving me the opportunity to bake something so fun!
Sunday, March 8, 2009
Cake Balls
Welcome to my Sunday project! Have you heard of cake balls? I recently discovered these when I ran across an article on DallasNews.com about a lady in Dallas who makes these (and apparently we sell then at Neiman Marcus though I did look online and didn't find any). Since then, I've been talking to (some might say "bugging") people at work asking if they have ever had these, made these, and or had any advice to dispense before I got started. Well, I didn't get any advice at work, but I did enough research today to boost my cake-ball-making confidence.
These were pretty easy to make (though they do require a lot of chilling / freezing time), but the thing that frustrated me the most was the lack of real step-by-step instruction on how to make these so I'll be a little more detailed than usual.
Cake Balls
1 box, yellow cake mix (and the necessary ingredients to make that cake)
1 package cream cheese or neufchatel, softened
1/2 cup confectioners sugar
1/2 14-oz can sweetened condensed milk
1 12-oz bag of semi-sweet chocolate chips
1 12-oz bag of milk chocolate chips
Nuts or sprinkles or fleur de sel
Parchment or waxed paper
Bake the cake according to the directions on the package.
While the cake is baking, mix together the cream cheese and confectioners sugar to make cream cheese frosting.
Once the cake is done, crumble it in a large mixing bowl with the cream cheese frosting and condensed milk. You want it to have the same consistency as your cornbread dressing.
Cover and refrigerate for about 2 hours.
After chilling, make little balls out of the cake mixture. To ensure a consistent size, you can use a tablespoon or melon baller. Place the cake balls on parchment or waxed paper.
Freeze for at least 4 hours.
In a small bowl, combine an even mix of milk and semi-sweet chocolate chips. Microwave for 30 seconds, stir, and microwave another 15-30 seconds. It's best to melt the chocolate in batchessince it does tend to be easier to dip the cake balls when the chocolate is warm.
Pick up a cake ball, drop it in the chocolate and, with two toothpicks, turn the cake ball to coat completely in chocolate.
Set aside on parchment or waxed paper and sprinkle with your topping before the chocolate sets.
Once you're done with dipping, let the chocolate set in the fridge or the freezer.
Notes:
1. All the recipes I found called for either Almond Bark or Confectioner Wafer Coating. I think the consistency for Confectioner Wafer coating is a bit different from regular chocolate chips. You can get these wafers at the grocery store in the same section where you find chocolate chips.
If I were to guess, it would probably be more like the chocolate you get your ice cream dipped in at Dairy Queen. Next time I make these, I'll use the wafers since the chocolate chips made for a really thick coating. You can get these wafers at the grocery store in the same section where you find chocolate chips.
Additionally, if you want to do different colors, you can get the white wafers and color with oil-based candy dye.
2. You can make all sorts of flavor combinations. Check out these suggestions.
Sunday, March 1, 2009
Whole Roasted Sea Bass
I hate to admit it, but I have no emotional ties to sea bass like some other people seem to have. From the way some people rave about it, you would think that not only did they eat that delicious sea bass, but they raised it, sent it to school, put an Honor Roll bumper sticker on the minivan for it, and walked it down the aisle. Not me. To be perfectly honest, I picked this up at these up at the store because they were on cheap (3 whole frozen sea bass for just under $5 - obviously not the fancy Chilean sea bass.) That being said, I'm glad I did.
Here's what I did with them:
Scaled & removed the fins
Seasoned with kosher salt (liberally) & freshly ground black pepper
Stuffed with flat-leaf parsley, rosemary, and slices of lemon
Drizzled with olive oil & lemon juice
Topped with scallions
Roasted at 450 degrees for 18 minutes
Served with salad & toasted french bread
Note:
Once you've cooked the fish, cut along the backbone from the head to tail to separate the flesh from the bone. You'll be able to lift the top fillet to get to the bones. You can then lift up the bones and serve the remaining fillet.
The sea bass I picked up was Ecuadorian. It's commonly used in ceviche. If you're familiar with ceviche, then you'll know that this fish is light in flavor and has the flakiness of salmon (not too flaky but not firm like tuna.)
For more flavor next time, I would probably use garlic oil instead of plain olive oil. You can make garlic oil by chopping some garlic and heating up some olive oil over medium heat, being careful not to burn the garlic. After removing the garlic, you could pour the oil over the fish just before roasting.
Saturday, February 28, 2009
Tres Leches Cupcakes
Soak just about anything in condensed milk and top with real whipped cream and chances are I will eat it. Could this be why tres leches cake is just a little too hard for me to resist? Ok, so I have to preface this recipe by telling you that I go to the gym 5 times a week. I have to. There are just some things in life for which you are willing to sacrifice. See below:
Tres Leches Cupcakes
1 box of regular yellow or white cake mix, prepared (should make 24 cupcakes) + 2 tbsp lemon zest
1/2 12 oz can evaporated milk
1/2 14 oz can sweetened condensed milk
1/2 cup whole milk
1/2 cup whipping cream
1/4 cup confectioners' sugar
Bake your cake mix according to the instructions for cupcakes (plus the 2 tbsp lemon zest), or you can use this made-from-scratch recipe (minus the poppy seeds). If you are, in fact, making cupcakes, you'll definitely want to use baking cups.
While you're waiting for your cupcakes to bake, mix the evaporated milk, condensed milk, and whole milk in a saucepan and cook over medium heat till just boiling. Stir frequently. Remove from heat, transfer to a bowl, and cool completely.
After the cupcakes have finished baking, keep them in the pan. Using a toothpick or the thin end of a chopstick, poke holes in the cupcakes. Drizzle the tres leches sauce over the cupcakes. Cover and chill.
In a large mixing bowl, beat whipping cream and sugar until stiff peaks form. Once the cupcakes have cooled, or immediately before serving, spread the whipped cream over the tops of the cupcakes.
Notes:
Tres leches translates to "three milks."
I saw a recipe for tres leches cake that included fresh strawberries in between the layers. For cupcakes, you could spread strawberry preserves on top before topping with whipped cream. Or you could top the whipped cream with slices of strawberry.
A friend at work recommended sprinkling cinnamon on top of the whipped cream.
Cinnamon Raisin Bread
What is is about cold weather that makes people want to bake? In our house, when it's cold outside (and inside too), the two warmest options are to sit in the sunny room and read till you fall asleep or hang out in the kitchen while something is baking. As for me, I choose the latter. Naps are nice, but bread is nicer.
I did a quick Google search for cinnamon raisin bread, and this was the first result:
1 1/2 cups milk
1 cup warm water (110 degrees F/45 degrees C)
2 (.25 ounce) packages active dry yeast
3 eggs
1/2 cup white sugar
1 teaspoon salt
1/2 cup margarine, softened
1 cup raisins
8 cups all-purpose flour
2 tablespoons milk
3/4 cup white sugar
2 tablespoons ground cinnamon
2 tablespoons butter, melted
DIRECTIONS
Warm the milk in a small saucepan until it bubbles, then remove from heat. Let cool until lukewarm.
Dissolve yeast in warm water, and set aside until yeast is frothy. Mix in eggs, sugar, butter or margarine, salt, and raisins. Stir in cooled milk. Add the flour gradually to make a stiff dough.
Knead dough on a lightly floured surface for a few minutes. Place in a large, greased, mixing bowl, and turn to grease the surface of the dough. Cover with a damp cloth. Allow to rise until doubled.
Roll out on a lightly floured surface into a large rectangle 1/2 inch thick. Moisten dough with 2 tablespoons milk. Mix together 3/4 cup sugar and 2 tablespoons cinnamon, and sprinkle mixture on top of the moistened dough. Roll up tightly; the roll should be about 3 inches in diameter. Cut into thirds, and tuck under ends. Place loaves into well greased 9 x 5 inch pans. Lightly grease tops of loaves. Let rise again for 1 hour.
Bake at 350 degrees F (175 degrees C) for 45 minutes, or until loaves are lightly browned and sound hollow when knocked. Remove loaves from pans, and brush with melted butter or margarine. Let cool before slicing.
Notes:
This recipe turned out nice and moist, and the final brush of melted butter on the bread kept the crust from turning hard. It also kept for several days in the fridge.
The only problem with this recipe is that we had a lot left over. What could you do with leftovers?
-You could share with your friends if you're feeling generous.
-You could make French toast.
-You could even cut the bread into smaller cubes, drizzle with melted butter, and bake till you have sweet croutons to top your fruit salad. (Did I just invent something here?)
-Or how about bread pudding? *gasp*
Sunday, January 11, 2009
Cioppino (Seafood Stew)

I can't tell you how many times I've thought about trying to make cioppino. Something about seafood soup is almost overwhelmingly appealing to me. As I sat at our kitchen table this Saturday thinking about how bored I was, how cold it was, and how crabby I was about to be, I resolved to pick out a recipe and make it my Saturday afternoon project. What better choice than cioppino, which would require a trip to Central Market (whoo-hoo!) for mussels and other fresh seafood, would require the use of my favorite kitchen equipment (the pretty red Dutch oven) and would warm me up on this frigid day?
I found several recipes on epicurious.com for cioppino. If you know me, you know that I glanced at all of them and made up my own from bits and pieces of each.
Here's what I came up with:
1 medium yellow onion, sliced
1 fennel bulb, sliced
3 garlic cloves, minced
red pepper flakes
1 whole bay leaf
1 1/2 cup zinfandel
1 (28oz) cans stewed tomatoes, crushed or cut into smaller pieces
2 cups vegetable (or fish) stock
1 cup clam juice
1 lb mussels
1 lb mahi-mahi (or other firm fish), cut into 1-in cubes
1/2 lb bay scallops (optional)
1/2 lb squid, sliced into rings (optional)
olive oil
salt & pepper
1 lemon
sourdough to serve with the soup
In a large pot, heat olive oil over med-high heat. Add the onion, fennel, garlic, red pepper flakes, and bay leaf, season with salt and cook for about 5 minutes or till the onion is translucent.
Add wine and boil till reduced by about half, about 5 minutes.
Add the tomatoes, stock, and clam juice, season with salt, and simmer uncovered for 30 minutes. Season according to your taste as this will be the last time you season.
Add the mussels and squid and cook for about 5 minutes, covered. After 5 minutes, take out the opened mussels and cook the closed ones for another few minutes. Discard any that haven't opened after 10 minutes of cooking.
Add the fish and scallops and cook for 3-5 minutes.
Remove bay leaf.
Serve immediately over the mussels with sourdough bread and add a few drops of fresh lemon juice.
Notes:
1. One of the reasons I have always been hesitant to make this is that I don't know if all of the cioppino I made would be eaten that day. I discovered the solution to this problem. Once you have made your soup (without the seafood), you can split your batch in half. Add half of your seafood to half of your soup and save the rest for tomorrow or day-after-tomorrow (but not any longer than that).
2. I might suggest adding some tomato paste to the soup when you add your tomatoes. I liked the result from the recipe above, but it might have been a bit better with a heartier tomato taste.
3. I ended up with more seafood than soup; if you are ok with that, keep the recipe as is. Otherwise, you may want to add more liquid and adjust the seasoning to compensate.
4. Notice a lot of the seafood I added to the recipe is optional. I think the key ingredients are mussels and fish. Everything else is a tasty bonus. Feel free to add crab legs, lobster, clams, etc.
All in all, a success for a first attempt.
Sunday, December 21, 2008
Cheap Eats Part II: White Beans & Smoked Sausage

When I calculated the cost per serving in this dish, I almost fainted. I could not believe that a little over $8.00 could feed at least six people (or two people thrice) and still taste pretty darned good - kiss it, Dollar Menu! This recipe was born from a contemplative look in the pantry and fridge and a strong desire to put off going to the grocery store for just one more day.
Here's what I saw sitting around:
a couple of cans of Great Northern white beans
a can of diced tomatoes
one pound of smoked sausage
white rice
Here's how I put it together:
1 lb smoked sausage, sliced into thin rounds
1/2 cup of diced onions (you could also add diced green bell peppers)
1 large clove of garlic, minced
1 (14 oz) can of diced tomatoes
2 cans white beans (Navy/Great Northern)
1 tbsp chopped Italian parsley (optional)
1 tbsp lemon juice (optional)
In a large pot, cook the sausage over med-high heat till browned. Add onions, lower heat to medium, and cook till translucent.
Add minced garlic and cook for a couple of minutes (taking care not to burn it).
Add the beans and tomatoes and simmer for about 20 minutes.
Season with salt and pepper to taste.
Just before serving, mix in the parsley and sprinkle with a little lemon juice. These two ingredients add freshness and brighten up the dish.
Serve over rice.
This is what I would spend if I went out today and bought all the necessary ingredients:
sausage, $2.50 (it's even cheaper if you use smoked turkey sausage)
2 cans of beans, $1.16 (if you cooked your own beans, you'd spend less money but it might take a bit longer)
1 can of tomatoes, $.63
1 onion, $.79
1 head of garlic, $.99
1 bunch Italian parsley, $.79
1 lemon, $.30
1 lb rice, $.98
$8.14 total ($1.36/serving), and you'd still have ingredients left over for your next cheap eats recipe.
Sunday, December 14, 2008
Fruit & Nut Bark

Pretty much everything I did today was for my Secret Santa gifts. I went to Central Market and the Botanical Gardens to prepare...I've already decided (and I hope she doesn't yet know about my blog, otherwise the secret is blown!) what I'm going to do for her three gifts.
The first gift is a vase with pebbles and paperwhite bulbs. The hint in this gift is that my dad was a botanist, though the green thumb seems to have skipped a generation.
The second is going to be a print of a picture I took at the Fort Worth Botanical Gardens today. The hint in this gift is that I like to take pictures. This isn't going to be a very good hint since we're doing our Secret Santa with the Photography team (haha!)
The last gift will be this fruit and nut chocolate bark. The hint here is that I like making food. I'd originally considered doing peppermint bark but then I wouldn't have had an excuse to go to Central Market today.
At Central Market, I headed right for the bulk foods section. (Have I mentioned before this is my favorite part of the store!? The cheese and bread section are tied for second place.) I picked up dried apricots, dried cranberries, raisins, and whole almonds.
I got this fruit and nut bark idea from an episode of Barefoot Contessa. Ina Garten used white chocolate. I'm not a big fan of white chocolate. First, it's not really chocolate. Second, it's way too sweet. Instead, I used a combination of milk chocolate and dark chocolate chips. About a 1:1 ratio. I put these in a ceramic bowl and microwaved for 30 seconds, stirring, and microwaving another 30 seconds, and so on until the chocolate was just about melted.
I spread out the chocolate on parchment paper, and (oops, I forgot to tell you that I chopped up the dried fruit and nuts) sprinkled the fruits and nuts on top. I sort of patted them down so that they would set in the chocolate when the chocolate hardened.
This big chunk of chocolate went into the fridge for about 45 minutes. After the chocolate hardened, I cut irregular chunks using a big hefty knife to make it look like bark.
I guess the beauty of this treat is that you can't feel too guilty about eating it. Dark chocolate is good for you and your mood. Almonds are good for lowering cholesterol. Cranberries are full of antioxidants and can cut bad cholesterol. Apricots have betacarotene and lots of fiber. Raisins also contain some antioxidants as well. Basically, if you eat this treat, you will
feel happy and antioxidated!Note: Try all sorts of combinations of dried fruits and nuts when you make yours!
Cranberry Bread

For Thanksgiving this year, we had a pretty traditional menu: roasted turkey, mashed potatoes, cornbread dressing, caramelized carrots, and green bean casserole.
We invited Garth's mom over for dinner, and when she asked if she could bring anything, I asked if she would bring cranberry sauce and maybe dessert.
She brought both, and the dessert she brought over was this cranberry bread which was delicious! When she left us that night, we had nearly a whole loaf of it. It lasted only two days.
I asked her for the recipe; she told me it was on the back of the bag of cranberries. I hope you enjoy it as much as we did.
Cranberry Bread
2 cups flour
1 cup sugar
1 1/2 tsp baking powder
1 tsp salt
1/2 tsp baking soda
3/4 cup orange juice
2 TBSP oil
1 TBSP grated orange peel
1 egg, well beaten
1 1/2 cup fresh cranberries - coarsely chopped
1/2 cup chopped nuts (I like pecans)
Preheat oven to 350 F.
Grease 9 X 5 loaf pan.
Mix together flour, sugar, baking powder, salt, & baking soda in a medium mixing bowl.
Stir in orange juice, oil, orange peel and egg. Mix until well blended.
Stir in cranberries and nuts. Spread evenly into loaf plan.
Bake for 55 minutes or until toothpick inserted in the middle comes out clean.
Cool on rack for 15 minutes.
Remove from pan and completely cool.
Makes 1 loaf.
*Doris (Garth's mom) also left us with some cream cheese to spread on top of the bread. That made for a great quick breakfast.
Saturday, December 6, 2008
Cheap Eats Part I: Beef Stew

Frugality, for me, is always a hobby and sometimes a necessity. While I do like to experiment with fancy foods and exotic ingredients, my base recipes (those I make on a regular basis) are almost always cheap eats. Consider this your first installment in a series dedicated to recipes that cost very little per serving yet satisfy our need to have delicious nourishment.
Now you may not think that "beef" and "cheap" belong in the same sentence, but this is not the case in beef stew. Let's check it out:
Beef & Vegetable Stew
1 lb stew meat ($3.25 or less)
2 tbsp AP flour (I'm not counting this - you should have this on hand)
1 tbsp canola oil
1 28-oz can diced tomatoes ($1.25)
1 16-oz carton beef broth ($1.50)
1 16-oz bag frozen mixed vegetables ($1.50)
1/2 an 8-oz package of dried tortellini ($2.00 for the whole bag)
1 cup water
Salt (or soy sauce) & pepper to taste
Toss the cubed stew meat in flour and shake off the excess - add a little salt and pepper to season. Heat the oil in a Dutch oven or other large pot. Brown the beef on all sides.
Add diced tomatoes, beef broth, and vegetables. Season with salt (or soy sauce) and pepper. Bring to a boil, then cover and simmer for about an hour. Check for seasoning and adjust as needed.
Add one cup of water, bring back to a boil, and add the dried tortellini. Cook for about 15-17 more minutes. Check seasoning and adjust if necessary.
Serves 4-6.
So that's $9.50 for the whole meal to serve at least 4 people ($2.38 or less per serving). And yes, you can leave out the tortellini and add navy beans instead ($.60 a can) and save $1.40. You can even leave out the beef altogether and save yourself another $3.25.
If that isn't cheap eats, I challenge you to show me what is. Except ramen. Because you can't beat the price of ramen.
Apple Pie
So simple, yet so delicious is apple pie that I couldn't resist posting this recipe I used for my apple pie project a few weekends ago. I really have to admire Ina Garten and her simple and classic recipes. I used her recipe (slightly modified) and prepared pie crust instead of making my own (too lazy).
Apple Pie
3 lbs Granny Smith applies, peeled, quartered, and cored
1 lemon, zested
1 orange, zested
2 tbsp freshly squeezed lemon juice
2 tbsp freshly squeezed orange juice
1/2 cup sugar
1/4 cup flour
1 tsp kosher salt
3/4 tsp ground cinnamon
1/2 tsp ground nutmeg
1 egg, beaten with 1 tsp water for egg wash
Preheat the oven to 400 degrees F.
Cut each apple quarter in thirds crosswise and combine in a bowl with the zests, juices, 1/2 cup sugar, flour, salt, cinnamon, and nutmeg.
Roll out half the pie dough and drape it over a 9- or 10-inch pie pan to extend about 1/2-inch over the rim. Don't stretch the dough; if it's too small, just put it back on the board and re-roll it.
Fill the pie with the apple mixture. Brush the edge of the bottom pie crust with the egg wash so the top crust will adhere. Top with the second crust and trim the edges to about 1-inch over the rim. Tuck the edge of the top crust under the edge of the bottom crust and crimp the 2 together with your fingers or a fork. Brush the entire top crust with the egg wash, sprinkle with 1 teaspoon sugar, and cut 4 or 5 slits.
Place the pie on a sheet pan and bake for 1 to 1 1/4 hours, or until the crust is browned and the juices begin to bubble out. Serve warm.


Apple Pie
3 lbs Granny Smith applies, peeled, quartered, and cored
1 lemon, zested
1 orange, zested
2 tbsp freshly squeezed lemon juice
2 tbsp freshly squeezed orange juice
1/2 cup sugar
1/4 cup flour
1 tsp kosher salt
3/4 tsp ground cinnamon
1/2 tsp ground nutmeg
1 egg, beaten with 1 tsp water for egg wash
Preheat the oven to 400 degrees F.
Cut each apple quarter in thirds crosswise and combine in a bowl with the zests, juices, 1/2 cup sugar, flour, salt, cinnamon, and nutmeg.
Roll out half the pie dough and drape it over a 9- or 10-inch pie pan to extend about 1/2-inch over the rim. Don't stretch the dough; if it's too small, just put it back on the board and re-roll it.
Fill the pie with the apple mixture. Brush the edge of the bottom pie crust with the egg wash so the top crust will adhere. Top with the second crust and trim the edges to about 1-inch over the rim. Tuck the edge of the top crust under the edge of the bottom crust and crimp the 2 together with your fingers or a fork. Brush the entire top crust with the egg wash, sprinkle with 1 teaspoon sugar, and cut 4 or 5 slits.
Place the pie on a sheet pan and bake for 1 to 1 1/4 hours, or until the crust is browned and the juices begin to bubble out. Serve warm.

Sunday, October 5, 2008
Southern Sausage Roll
Boneda's mom served this at Brecken's pre-wedding photography session at the lodge, and I almost passed out because it was so good. I asked for the recipe, but Southern women have a tendency to let recipe requests slip their minds. That wasn't going to deter me.Maybe my version isn't exact, but the result was still delicious. And you can't beat a recipe that involves three ingredients and still gets rave reviews. So it isn't the fanciest thing you'll ever eat, but fancy doesn't always mean delicious.
Since there is already a UK/Australian version of the sausage roll which is a little different from this one, we'll call this a Southern Sausage Roll.
Southern Sausage Roll
1 lb breakfast sausage
2 tubes/cans refrigerated croissant dough
1 lb cream cheese or neufchatel cheese
Preheat oven to 375F.
Cook the sausage into crumbles until it is no longer pink. Over medium heat, incorporate the cream cheese. Take off the heat and set aside.
On a lightly floured surface, roll out the dough into two long rectangles (one per can). Spoon the sausage and cheese mixture onto the middle of each "crust" and fold the two sides over.
Bake, seam side down, for 11-13 minutes. Allow the roll to cool for about 10 minutes before slicing and serving.
Notes: If you're looking for a lighter version, use turkey sausage and add a teaspoon of crushed red pepper. Neufchatel is lower in fat than cream cheese but it is equally creamy. It is a really good alternative for cream cheese.
The Aussie version includes chopped onions, herbs and garlic, and is wrapped in puff pastry instead of croissant dough.
Sunday, September 14, 2008
Blueberry Crumb Cake
I love cake! I really do.Cake is not something I get to eat very often, so when it's time to eat cake, it has to be special and delicious. I don't get tempted by the cakes in the bakery section at the grocery store. My weakness is the real stuff. The stuff you find in independent bakeries at the corner of some shopping plaza or, better yet, the stuff you make at home.
I watched Ina Garten (Barefoot Contessa) make this blueberry crumb cake, and I resolved to make that cake one day. I did, and the results were fantastic.
Here's the recipe:
For the streusel:
1/4 cup granulated sugar
1/3 cup light brown sugar, lightly packed
1 teaspoon ground cinnamon
1/8 teaspoon ground nutmeg
1/4 pound (1 stick) unsalted butter, melted
1 1/3 cups all-purpose flour
For the cake:
6 tablespoons unsalted butter, at room temperature (3/4 stick)
3/4 cup granulated sugar
2 extra-large eggs, at room temperature
1 teaspoon pure vanilla extract
1/2 teaspoon grated lemon zest
2/3 cup sour cream
1 1/4 cups all-purpose flour
1 teaspoon baking powder
1/4 teaspoon baking soda
1/2 teaspoon kosher salt
1 cup fresh blueberries (I used frozen which turned out great)
Confectioners' sugar for sprinkling
Preheat the oven to 350 degrees F. Butter and flour a 9-inch round baking pan.
For the streusel:
Combine the granulated sugar, brown sugar, cinnamon, and nutmeg in a bowl. Stir in the melted butter and then the flour. Mix well and set aside.
For the cake:
Cream the butter and sugar in the bowl of an electric mixer fitted with the paddle attachment on high speed for 4 to 5 minutes, until light. Reduce the speed to low and add the eggs 1 at a time, then add the vanilla, lemon zest, and sour cream. In a separate bowl, sift together the flour, baking powder, baking soda, and salt. With the mixer on low speed, add the flour mixture to the batter until just combined. Fold in the blueberries and stir with a spatula to be sure the batter is completely mixed.
Spoon the batter into the prepared pan and spread it out with a knife. With your fingers, crumble the topping evenly over the batter.
Bake for 40 to 50 minutes, until a cake tester comes out clean. Cool completely and serve sprinkled with confectioners' sugar.
Notes: I said I love cake. That doesn't mean I love for everything to be sugary-sweet. I followed the recipe for the streusel topping but only ended up using about half. It worked perfect for my taste, so adjust the amount according to your personal need for extra sweetness.
As I mentioned, I used frozen blueberries. There is no difference in taste between fresh and frozen in this recipe. Save yourself the extra bucks and go for frozen unless you just went blueberry picking last weekend.
Monday, September 1, 2008
Homemade Bread
Homemade bread is something I've always been afraid to try, mostly because I'm worried that I'll end up with something that resembles a brick (in weight and texture). Maybe it was the long weekend that got me relaxed and easy going, but I thought I'd give it a try today. The recipe I used was the one I found on the package of Red Star Quick-Rise Yeast. As you can see from the picture, the end result looked great. And it tasted good too. The inside was still warm and dense and soft while the outside was crusty.
Making this bread today reminded me of when I was young and my mom would take my sister and me to the grocery store with her. The last stop before coming home was the local baker where she would pick up a couple of baguettes. I would sit in the back seat of our white Datsun station wagon and break off the end of the baguette and dig in. By the time we got home, the baguette was hollow and my sister was fuming! Ha! I can still remember how mad she would get.

Anyway, the recipe was simple:
White Bread
6.5 to 7 cups AP flour
2 pkgs quick-rise yeast
3 tbsp sugar
1 tbsp salt
1 1/4 cups water
1 cup milk
2 tbsp vegetable oil
Combine 3 cups of flour, yeast, sugar and salt and mix well.

Blend at low speed until moistened (I used a large plastic mixing spoon), beat for 3 minutes (again, I used the spoon).
Gradually stir in enough remaining flour to make a firm dough.
Knead on floured surgace till smooth and elastic (5-8 minutes; I did 8 minutes).
Place in a greased bowl. Cover and let rise in a warm place till almost doubled (30 min).
Punch down and divide dough into two parts.
On a lightly floured surface, roll each half into a rectangle (recipe suggests 14" x 7"; I didn't get out my tape measure).
Roll up tightly (starting with shorter side) and pinch the edges and ends to seal.
Place each roll into a greased loaf pan.
Cover and let rise for about 20 minutes, or until an indentation remains after lightly touching the side of the loaf.
Preheat oven to 400F and bake for about 35-40 minutes until golden brown.
Remove from the pan as soon as you take it out of the oven. Cool.
Since I just baked this today, I'm not really sure how long the bread will keep well, but I'm going to venture to say it will keep for about 3-4 days out on the counter. If I'm wrong, I'll update this post.
Next homemade bread experiment will involve cinnamon and raisin; the one following that will involve wheat flour mixed in and possibly some nuts and grains too.
I hope you give this a try too. It was worth it and not near as hard as I thought it would be. Yeah, it's a little time consuming (rising, baking, kneading), but the taste is worth the time.
Subscribe to:
Posts (Atom)